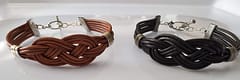
Beaded Leather Cuff Wrap Bracelet
Casual or business, this design fits any occasion
Contents
Introduction
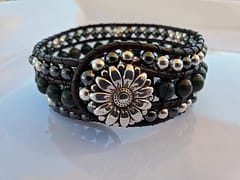
Create this leather ladder wrapped bracelet using 2 sizes of beads to make a cuff with 3 rows of beading.
Project time - about 4 hours
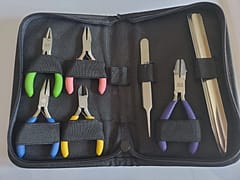
Supplies
- 2mm Leather cord - 2 lengths of about 27-28 Inches
- 6mm rounds beads - (26-27 depending on length required)
- 4 mm round beads - about 86
- Beading thread
- Flexible beading needle (split or collapsible eye)
- Glue - E6000 craft glue
- Decorative Button
- Macrame board (optional but useful)
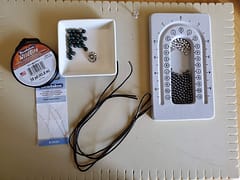
Having a macrame board is useful but not required. You could use a clipboard or cork board with pins as well. I have also used a bulldog clip attached to a notepad in the past before I had a macrame board. If you are doing this though place a piece of kitchen roll between the leather cord and the clip as you can damage the leather finish on the loop with this method.
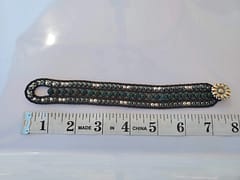
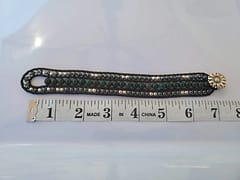
Fitting the Length
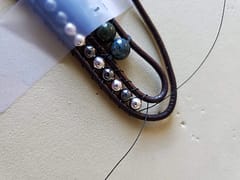
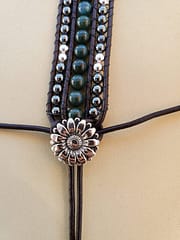
I used 25, 6mm beads for the centre row this created a bracelet of just under 8 inches in total length, but it is important to note that when you are wearing this style of bracelet the fastening overlaps slightly so it fits a wrist size of just over 7 inches (note in the photo below where the button will actually sit when the cuff is fastened. 25 beads gave me a bracelet that is a snug fit. I would recommend using 26-27 for a wrist size of 7-7.5 inches depending on how tight you like your bracelets to fit.
Total Length of bracelet
To Fit Length of bracelet
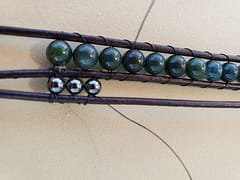
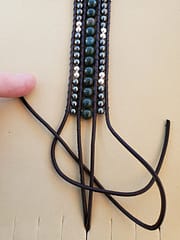
The Centre Row
Cut two lengths of 2mm leather cord, take one length, fold in half and secure to the macrame board by creating a loop around a pin and secure the two ends into the board at the bottom.
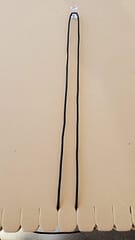
You could secure the cord into the macrame board at both the top and bottom but this will create a pretty big loop that could be too large to hold your button at the end so keep this in mind when deciding how to secure your cords. Test the size of the loop against your button after you have added a couple of beads.
Cut a length of about 1.5 metres of the beading thread and slip it under your leather cords making sure it is centred, then thread one of your 6mm beads and centre it between the two cords.
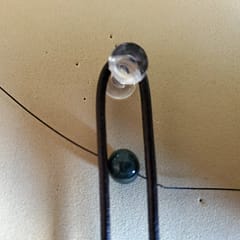
Bring the thread ends up over the cords and then thread each end through the bead again from opposite sides, and pull through. This is your first wrap, as it is the starting point you should pass the threads ends down under the cords on each side and then bring up in the middle, and again thread through the bead from opposite directions - looping around like this 2-3 times will secure the starting bead in place.
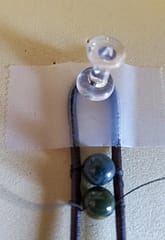
I found that adding a piece of tape to hold the loop down useful at this point and then pushed the pin through the tape.
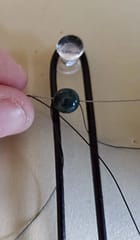
You can then continue working down adding more beads in the same way until you have your centre length of beads complete. Once you have your first bead in place the rest of the beads only need to be looped through once from each side as you work your way down.

Now that you have your first row complete, loop the beading thread through from one side so that both strands are on the same side. You can then tie off using a surgeon’s knot 2-3 times and pull it tight. Add a small drop of glue to the knot using a toothpick and let it dry, then you can either just trim the excess threads down from here or you can weave the strands through the beads a few time for extra security before trimming.
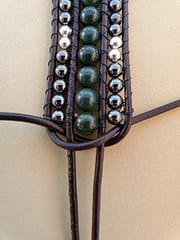
Second Row
Now take your second length of leather and attach it to the board on the outside of the centre length, leave the tail a part shorter on this length as you need more to work with.
You can then start your second row using the same method as the centre row although you will be working up instead of down. Secure the first bead by passing the threads through and around 2-3 times before proceeding up the cord.
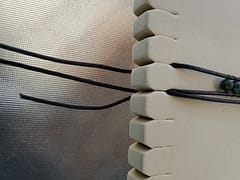
Once you get to the top continue adding beads and wrapping around the outside of the loop and then back down the other side.
You will need to tie off and start new thread a few times as you work around the outside using the same method as before to end the thread.
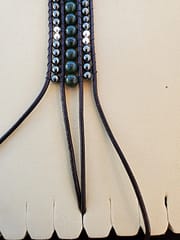
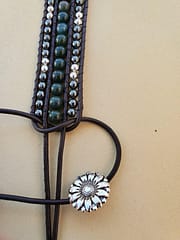
Finishing
To finish you tie an macrame square knot and glue. There are two stages to a square knot, q’s and p’s !
Secure the two centre cords into the bottom of the board Take the left hand cord and cross it over the two centre threads to form a lower case q shape. Take the right hand cord and pass it under the centre cords and pull up through the loop of the q shape and pull tight.
Before you do the second step you are going to thread the fastening button onto the right hand cord
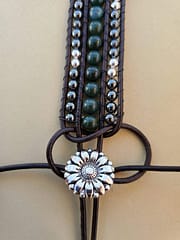
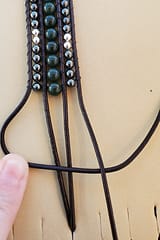
To complete the second part of a square knot take the cord on the right and fold it over the centre cords to form a lower case p shape, then take the left hand cord and pass it under the centre cords and pull up through the loop of the p shape. Pull tight guiding the button up with the knot so that the shank sits over and between the centre cords.
Once you have your knot complete and button in place we need to do another square knot and glue to secure it fully.
Flip your work over, keeping the centre cords secured in the board. Then complete the q and p of the square knot again. Before you fully pull the second stage tight, take a few small drops of glue and with a toothpick rub them inside the knot, then pull tight.
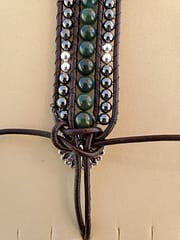


Once the glue is completely dry, trim the excess cord ends.
And that’s your completed leather cuff. Give it a try and see how easy it is. If you’d like to share your results check out our Artisanal Panda Arts & Crafts facebook group and post your finished project.
Like and follow our Artisanal Panda facebook page for all the latest posts, updates and notifications.