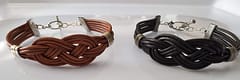
Leather Josephine Knot Bracelet Tutorial
A great afternoon project
Contents
Introduction
Create this stylish leather knot bracelet. With a Celtic feel of an infinity knot, easily made in about two hours it’s perfect for a weekend craft project.
Project time - 2 hours
Project cost - about $5 per bracelet (initial outlay will be higher but multiple projects can be completed with these materials and tools once you have them)
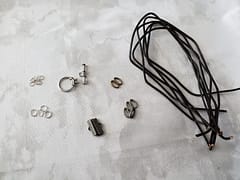
Materials
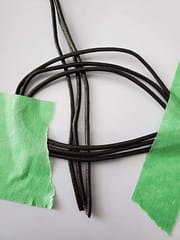
- About 2 meters of 2mm round leather cord, cut into 6 equal length pieces
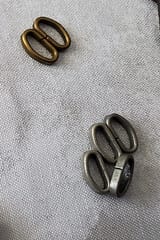
- D-Rings x 6
- Jump rings x 4
- Ribbon crimp close
- Toggle clasp
- E6000 glue
- Toothpick
- Tape
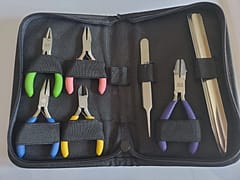
- Pliers - Flat Nose & Bent Nose
Cut your 2 meter length of leather into 6 smaller equals lengths.
Weaving the knot
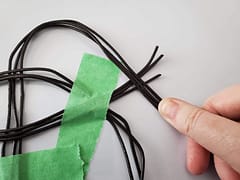
Take three pieces and line them up. Fold over each other into a loop at the center point and use some tape to hold the strings in place and keep them flat.
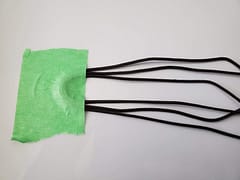
The three threads coming up from the bottom should lie on top of the others as they cross over. Keep the threads in order and don’t allow them to twist over each other, then tape down.
Painters tape is a good option as it doesn’t leave a residue and is also just tacky - some craft leather is dyed so stronger tape could pull the coating off the leather when you remove it.
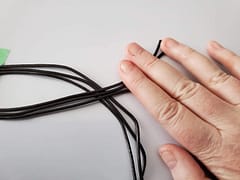
Take the other three strands, line them up and slip them under the taped down pieces, leaving a short tail at the bottom and a long one on top, tape down the short end.
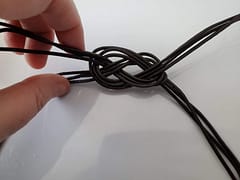
Then with the long tail start weaving the thread over and under, over and under, shown in the diagram below.

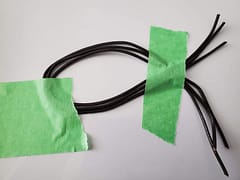
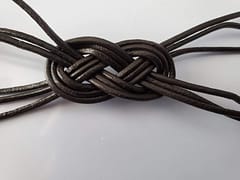
Once you have the rough weave shape, ensure that the strands are flat and not twisting around each other, remove the tape and pick up by the four ends and pull equally and slowly. As you pull to tighten keep flattening the strands so they remain untwisted. This part may take a couple of tries and a bit of fiddling.
Embellish & Trim Down
Slide 3 D-rings onto each side, I found that I could just get the 6 strands through even though it was a tight fit. Keep the threads in order while doing this so that you don’t add any twists to the strands.
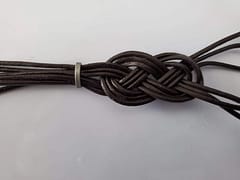
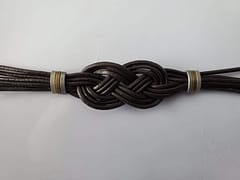
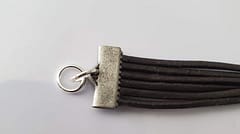
We now need to trim down the excess leather. I wanted to make a bracelet that was about 7-7.5 inches, so I trimmed my bracelet down to about 6 inches. Make sure your ends are equal and fit into the ribbon crimp.
Place the centre of the knot at the 3 inch point of the tape and trim either end

Finishing
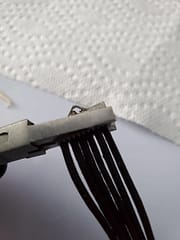
Take a ribbon crimp and dab a bit of glue inside using a toothpick, don’t use too much as you don’t want it to squeeze out the sides when you close the crimp.
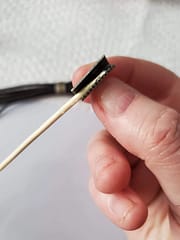
Close the crimp with the flat nose pliers, keep the strands flat and make sure they don’t pop out the sides as you close the crimp
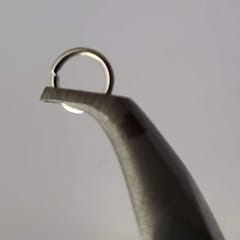
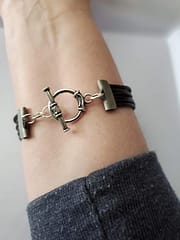
Using the bent nose pliers open and attach a jump ring to one side and add the circular part of the toggle clasp.
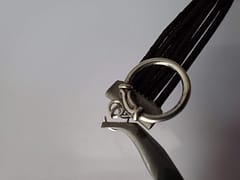
Add at least three jump rings to the other side and add the bar part of the toggle clasp. If you have trouble getting the bracelet to fasten on your wrist add another jump ring to this side, using additional jump rings on this side gives you more length if needed and allows more rotation on the bar making the bracelet easier to close.
And that’s it! Give it a try and see how easy it is. If you’d like to share your results check out our Artisanal Panda Arts & Crafts facebook group and post your finished project.
Like and follow our Artisanal Panda facebook page for all the latest posts, updates and notifications.